Bot Couture
What is Bot Couture?
"Couture" is a French word which means "The business of designing, making, and selling fashionable custom-made clothing". My work on this project specifically was to demonstrate to our stakeholders that we can use robots to manufacture jeans with the quality, consistency and time that is typical of that manufacturing process (or even exceed it). This project was sponsored by the ARM Institute.
Why?
This press release of our project (at the end of this section) walks through the why part of this project, among other things. Watch the video, I promise you will enjoy it!
Prelude
Skip this section if you'd like to read up on the background of this project directly from one of its sponsors, the ARM institute.
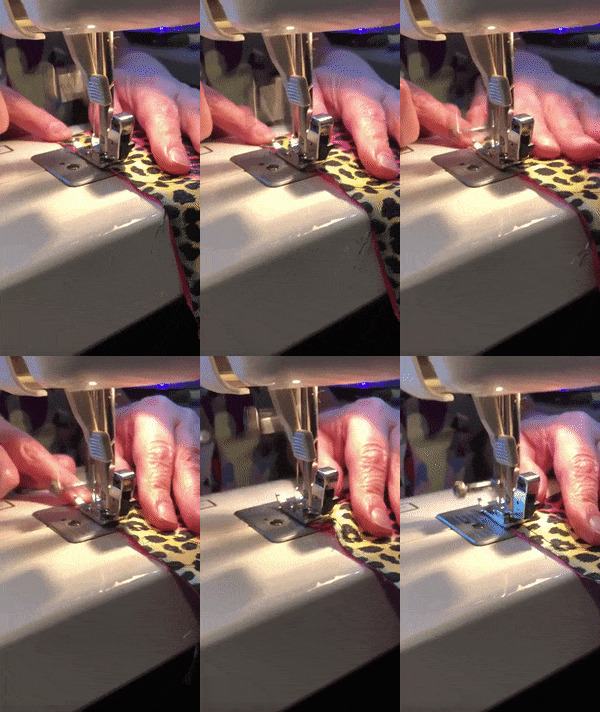
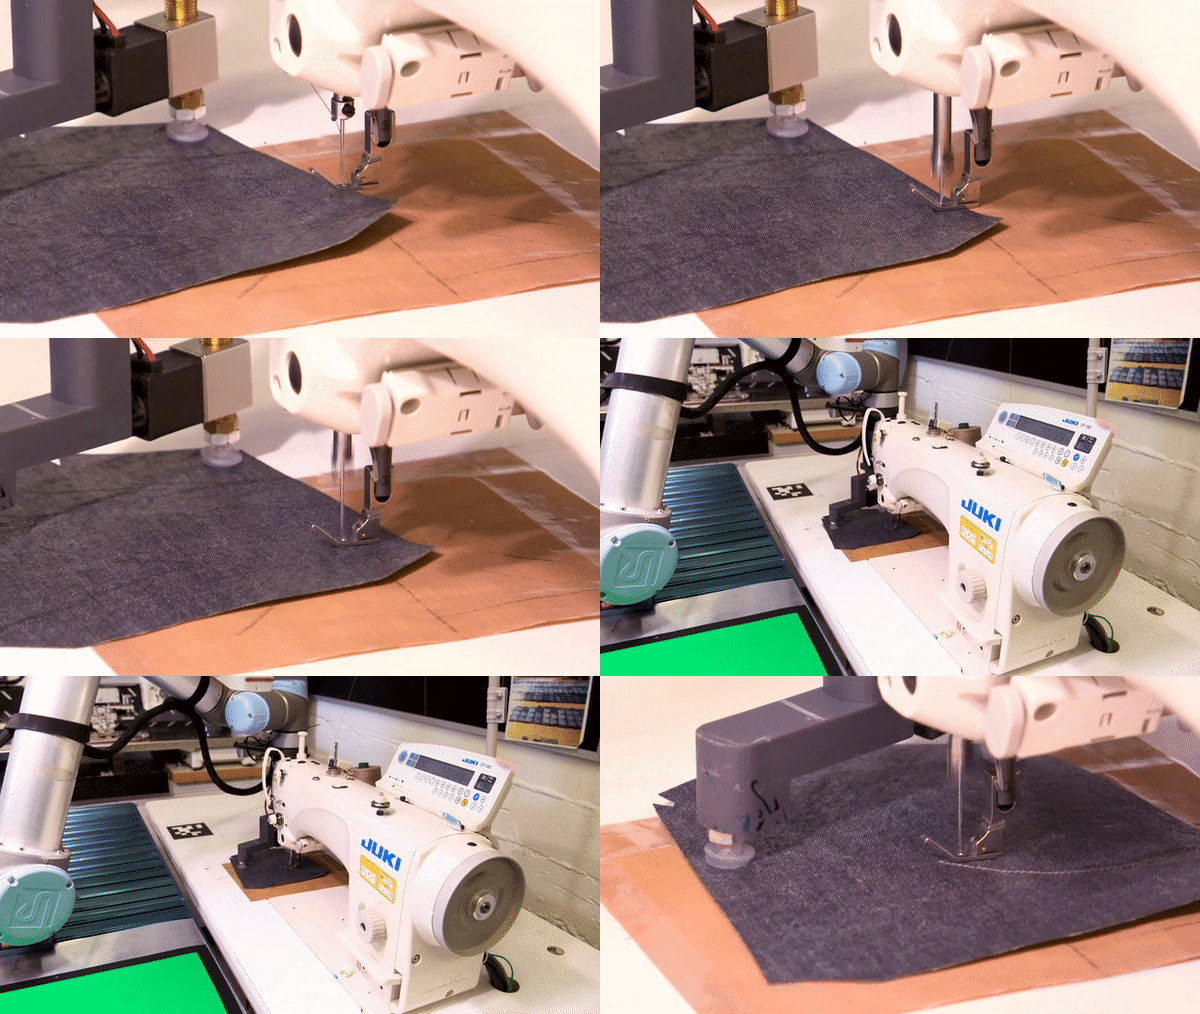
Even though manufacturing cloth material has been fairly automated for quite some time now, we still have way to go when it comes to the tailoring industry. Because this industry is labor-intensive, the companies that make these products usually ship off the manufacturing outside of the US (where labor costs are significantly lower) even though the US is the 2nd largest consumer of apparel industry products (next to China). Moreover, as mentioned in the press release, due to the pandemic, there have been severe labor shortages.
The need to perform garment sewing and assembly operations is now more than ever. But what is holding it back? It is the soft nature of fabric and the nature of operations that are needed to be performed on them which make them unfeasible for the state-of-the-art robotics technology to offer value. There are 2 ways to address this - change the operations so that this is not the case (if no robot can clean a manhole with the way it is built, change the manhole) or alternatively change the nature of the fabric.
Jonathan Zornow of Sewbo came up with this great idea where the fabric is stiffened using a non-toxic water-soluble polymer. It makes it rigid enough (and non-porous) to be handled like a sheet-metal by off-the-shelf robots. Siemens did exactly this in a series of projects before I joined.
The next phase was to improve the TRL of the solution (Technology Readiness Level) which would demonstrate if that technology belongs in the factory. This is what I was hired as an intern to do.
How did we do it?
Solution
- Robot Manipulation : We had a robotic arm equipped with a suction-gripper that could grip the non-porous stiffened pieces of fabric. I used them to pick, place and execute trajectories with the fabrics using :
- MoveIt! which is an open-source ROS library that provides functionality to plan and execute trajectories given a robot model.
- The interfaces to the low-level interfaces (drivers) and robot descriptions (URDF models) provided open-source by Universal Robots make the popular UR-5 robot used in this project.
- I added the Gripper CAD model to the URDF Model obtained from this library.
- Computer Vision : I performed intrinsic and extrinsic calibration on a static camera mounted in the workcell.
- This camera would then be used to provide an optimum picking location for the robot. I used (and developed upon) the in-house computer vision libraries for this.
- Further, the workcell had to be placed in front of different machines to perform the required operation.
- In order to take away any error that comes from the workcell being misaligned with respect to the machines, I used the apriltag_ros library, another open-source library provided by ROS to locate these machines with respect to the workcell with precision.
- This was done through a camera mounted on the robot's wrist for which I performed intrinsic calibration to accurately transform features detected by the camera (the tags) to the robot's frame.
- State Machines : Owing to the fact that there were a lot of tasks involved in all the processes, the fact that there was significant overlap between different tasks and the fact that some of these tasks had to be performed concurrently (multi-threading), I used an open-source state machine library, FlexBe.
- To minimize duplication and effort, I encapsulated certain set of tasks into state machines that could be included as part of a larger state machine (the sub-state machines are called Behaviors in the library's terminology).
- Planning Scene : Further, for the robot to perform tasks without hitting these machines, the model of its environment must be provided to the MoveIt motion planning framework. Chengtao at Siemens designed a solution to reconstruct the 3d model of these machines (the part of machine that lies within the robot's workspace).
- I assisted in the execution of the process of fitting his solution into this project, using the aforementioned calibrated wrist camera and including the reconstructed model into the planning scene.
My Scope
- Design and Implementation of the processes described in previous section; taking responsibility for their completion. This involved :
- CAD modelling
- Electronics (there were a lot of digital devices)
- Algorithm design
- System Architecture
- Even though the fabrics were stiffened, there was still indeterministic to a certain extent. I designed solutions that made them deterministic.
- Plan and coordinate the logistics.
- The demonstration process involved a lot of transportation to and fro from many locations.
- Handling the shipped machines.
- We had limited access to the facility for demonstration and we had some additional tasks we needed to demonstrate. I budgeted the time and planned and executed these tasks with success!
- Troubleshooting
- Tons of this. We even had some last-minute issues but we were able to mitigate them without compromising the integrity of our solution.
Results
Shown on the right are the outputs of various stages in which the jeans was manufactured. I have left out the other processes like stitching the zip and the inseams as they demonstrate the same process as stitching but with different parameters.
- The 1st process was to stitch the trademark pattern onto the pocket. The robot did this by guiding it through the sewing machine.
- The 2nd process was to create the required fold. The hemming machine provided by Vibemac did exactly this, and the robot pushed the pocket stitched in the 1st process to accomplish this.
- The 3rd process of setting the pocket onto the pant can be broken down into the following steps:
- Welding the tag onto the pant after placing it in the correct location.
- Placing the pant onto the Pocket setting machine provided by Vibemac and triggering the machine to release the fixture for placing the pocket.
- Placing the pocket and triggering the machine to complete the remaining process. The pocket is completely stitched to the pant at this point.
We were able to accomplish all this with the targeted accuracy, repeatability and (for most processes) time constraints. Further, we were able to accomplish this in the following varied conditions :
- Randomly placing the pieces of fabric in the workcell (Computer Vision).
- Placing the machine with respect to the robot in different poses within robot's workspace (Apriltags).
- Some differences in Lighting conditions.
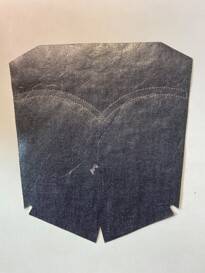
Trademark Pattern on Pocket
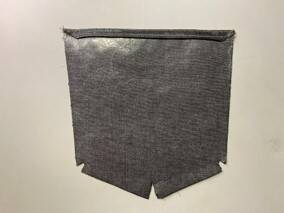
Hemmed (Folded) Pocket
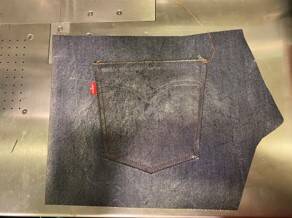
Pocket set into pant along with tag.
Acknowledgements
It goes without saying, I didn't do this on my own! In addition to the great team at Siemens, we had these wonderful people / organizations to thank for the success of this project!
- Jonathan Zornow (Sewbo)
- ARM institute
- Levis
- Vibemac
- Bluewater Defense